Sunday, December 6, 2009

Spreading the etsy love!

Some of the Lincoln Handmade Team members talked with Jerry Johnson/NETradio about their craft lives. Listen to the interview. Thanks Jerry! We had a lot of fun chatting with you!

Want to see some of the crafting we talked about?

Visit ChristyNelson's shop and blog.


*******************************


Visit refibered's shop and blog.

Santa suit tote bag


********************************


Visit crafterella's shop and blog.


crafterella

Tuesday, September 29, 2009

Craft.Shop.Local.Success

We had a great time at our first Lincoln Handmade event- Craft.Shop.Local. We didn't have a huge crowd attend, but those that did were buyers! We all agreed that this was one of the better crafting events we attended. It was a sunny, plesant day filled with friends and fun times. I think we'd all like to do another show like that again!
Craft.Shop.Local
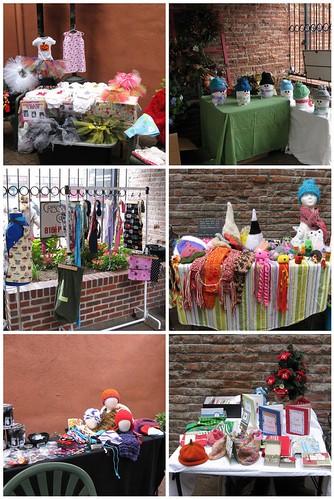
1. Stacy, 2. Karla and Amber, 3. Kelly, 4. Lisa, 5. Korrine, 6. Christy

Friday, September 18, 2009

Success with a Crafting Business

I am a stay at home/work at home mom and I have been trying to figure out how to contribute to our family budget without pursuing outside employment. I do generate some income with my etsy shop, but I would like to grow my business a bit more.large red focal pendant 1 (Shameless plug: Mokume Gane focal pendant available here)

I was really excited when I found this article: 10 Ways to Diversify Your Income as a Crafter or Artist There are some really interesting ideas (that had never occurred to me), what’s even better is that there are a wealth of other related articles to help expand some of these ideas. I am really excited to explore some of these suggestions further.

What is your favorite tip or sites for business advice? Leave a comment and let us know, and don’t forget our LNK Handmade craft show is coming up September 26th. Craft.Shop.Local for all of you in the Lincoln, Nebraska area, come by and say Hi!

Friday, September 11, 2009

Glommits and Gauntlets

I wrote this article several months ago and it was originally published over at Type-A Mom.

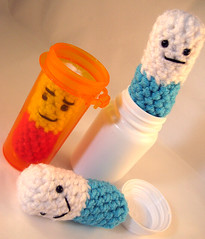
A young U.S. soldier serving in Afghanistan wrote a letter to his mom asking for 16 pairs of handknit gloves for his unit just like the ones his grandmother used to make. The mother wasn't able to fulfill that commitment herself so she contacted Halcyon Yarn in Bath, ME.

The yarn shop responded by mentioning the project in a newsletter and providing knitters with two vintage patterns. The Glommit is a combination glove/mitten. The mitten cap can be folded back to allow use of bare fingers. This type of handknit is useful for many different types of people, not just soldiers. The Gauntlet was designed in the style of an old hunter's mitten. The pattern was written to have the thumb covered, the index finger bare, and the remaining fingers under a mitten. This allows for quick access for shooting.

The gloves are knit with wool. Wool is the best natural fiber to use for outerwear such as gloves or mittens. The fiber is naturally waterproof and keeps hands warm. Having grown up in Maine, this soldier knew how to endure the cold, but not even he could take the harsh weather in the high altitude of Afghanistan.

In less than a year, over 125 pair have been donated to the cause. If you would like to participate in this unique service project, Halcyon Yarn will accept finished Glommmits and Gauntlets and ship them to where they need to go. You can find the Glommit pattern and the Gauntlet pattern at those links.

You never know when you'll be able to use your hobby to make a difference in the lives of others. This is one instance where some wool and a few hours of your time can help keep a soldier warm.


Wednesday, September 9, 2009

Craft. Shop. Local.


Lincoln Handmade Team and Etsy present: Craft.Shop.Local on September 26!

Several team members will be displaying and selling their handmade goods. Jewelry, toys, hats, scarves, pet toys, baby clothes and much more. Come out before the game to support handmade and shop local!

Thursday, August 27, 2009

Wool Jar Cozy


So, I had some wool roving that I hand felted into little dreads because I was going to wear them as hair falls to this big dance. Well it turns out that the dj's weren't going to be spinning my type of music, so I didn't use them. Being a (happy) resident of the Midwest, I didn't forsee needing them any time in the near future, either. And even if I did, it's easy to make more. So now I had all of these wool noodles! Sometimes I use them for hair on stuffies I make, but this time I decided to needle felt them togther to make a jar cozy.


It was really easy to do, I just wrapped and poked the needle parallel to the jar as I went. It didn't take much felting at all to get it to hold well.


I think it will be nice to hold crochet hooks or pencils.

Friday, August 21, 2009

Happy Feet!

Sewing machine feet, that is!

Modern, new machines come with at least a couple of alternate feet, and there are actually dozens of types you can get, whether brand specific or generic. Today I'm talking about my two favorite feet: walking and darning.

Walking foot (generic):
walking foot (generic)

The walking foot has long been a favorite of quilters. The white plastic feet on this foot help to keep multiple layers from slipping apart. It also is a joy when you're trying to match plaids or stripes.

To be honest, this is my most used foot. It has taken the place of my "A" (basic) foot, simply because it is such a helpful tool. Those pesky 1/4" seams are so much easier, and it's a must-have for quilting "in the ditch" (along seam lines).


Darning foot (Janome, open toe):
darning/embroidery foot

Lately though, I've been having a little fling with my darning foot. Also called an embroidery foot, this baby lets me go to town and do some free motion quilting (FMQ); all I have to do is drop the feed dogs, set this foot on the shank and off I go!

It's not just for quilting though. I have also been using it to do some free motion lettering. Embroidery, if you will. It produces a sketchy, jittery looking stitch, which must be repeated in order to get a thicker looking letter.

Here's an example:
Photobucket

The yellow and pink lines are washable markers. I used a ruler to create them, and used them to help make consistently sized letters. The "Etsy" was done completely free-hand.

Each letter has about five up-down/back-forth sets. They're not meant to be terribly neat-and-tidy, they're meant to evoke a loose scrawl. Takes a bit of practice, and patience. I'm looking forward to using it in some near-future projects.

Monday, August 17, 2009

Alternative Craft Supplies

I have always enjoyed going to craft stores, their neat isles of supplies all new and shiny. Miles and miles of paints, papers, fabrics, beads, and every other craft supply know to man, and the 40% off coupons every week, who could resist? The real problem with craft stores is this, anyone and everyone is buying the exact same thing that you are and your hand made item may not be so one of a kind.

I love finding new and unexpected supplies. Some of the best places I have found are thrift stores, auctions and yard sales. And for the brave there is also dumpster diving and taking things off the curb.

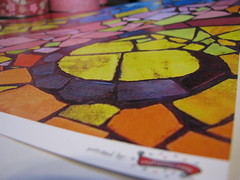
Thrift stores have a variety of items from clothing to household to furniture. It’s worth the time to find out when sales days are and to visit a store a couple of times to get a good feel for the types of merchandise that each store carries. I have one store that has the best clothes and I always try to go there for their $.99 clothing sales, but the house wares and furniture are a bit pricey for my taste. Here’s a stunning cut paper picture I purchased for $3.99 at my local good will, bonus it’s already matted and framed!

thrifted picAuctions can be a lot of fun, especially since they usually publish a listing of what will be for sale and allow you to preview the items before hand. You can even leave bids with the auctioneer if you are unable to stay for the entire auction. Be prepare to pay cash and to bid on an entire box of junk for just for one item. A thing to remember is at the end of an auction there are usually a lot of items left behind, just ask, often anything left behind is free for the taking. This is an overnight case I got for $7.00 at an auction, it’s in excellent condition just waiting to be painted or decoupaged. overnight case interior

Yard sales can be a great source of supplies, you name it and I’ve seen it at a yard sale! Check you local paper, craigslist, or look for signs. There are two ways to shop, go early so all the “good” stuff is still there or go late and bargain for better prices, the later it gets the easier it is to haggle, nobody wants to haul all of that stuff back into their house! Here’s some coveralls, a winter coat, a stack of children’s books, two pillowcases, and some bird wall decorations I bought for $3.75.yard sale purchase: $3.75

The thing to remember is that you can always alter the item, furniture can be painted, clothes can be reconstructed, etc. and when you don’t have a lot of money invested your free to try new techniques. The down side it that making a duplicate item is almost impossible. Good luck and happy shopping. Where is you favorite alternative place to get crafting supplies?

Friday, August 14, 2009

LNK Handmade- Party Style


Our new recruit, Anna, with Crafterella

Lisa and Crafterella's shrunken head 'Steve'. Seperated at birth?

Crafterella and her fancy tote bag that she spent FOREVER on. Was it worth it?

Christy and her glitter filled icon to all that is awesome.

Tuesday, August 11, 2009

Design Your Own Fabric and Scrapbook Paper

One night a husband and wife were talking. The wife said, "You know what would be cool? If I could print my own fabric." In another house, miles away, a similar conversation took place involving scrapbook paper. The husband said, "Make your own darn scrapbook paper." Two companies were born and now people all over the world are able to design, print, and buy their own fabric and scrapbook paper.

Design Your Own Fabric

Spoonflower is a relatively new site dedicated to printing your own fabric. It is free to sign up and you can purchase fabric designed by others. But, the real draw is the ability to upload your own designs and see them come to life on high quality cotton fabric. At $18 a yard, it is pricier than your average fabric store. You can also get a swatch for $5 or a fat quarter for $11. Even though it is quite a bit more in price, the chance to have your own design on fabric could be worth the extra. If you've ever searched high and low for the perfect piece of fabric to complete a project, you know the value of just being able to make it yourself!

Spoonflower has a blog where they show some of the fabrics made by their users and each week they have a contest for the fabric of the week. That fabric is then available for sale in the Spoonflower etsy shop for a week and the winner receives 5 yards of fabric for free. I can't wait to try it out myself!

Design Your Own Scrapbook Paper

craft sassy scrapbook paper

CraftSassy offers a similar service but for scrapbook paper. I actually got to try out the process and use some of the scrapbook paper. Basically, you upload an image and you can have it printed on high quality scrapbook paper in a variety of sizes. I used two different images and made some 12X12 pages and 6X6 pages.

The most difficult part of the process was deciding on an image to use! This paper is also a little pricier than your average scrapbook paper. But, you are paying for the service and the ability to make it exactly how you want it. Looking at it that way, it seems like a bargain at $2 a sheet (price varies for sizes). One thing that appealed to me about this company is that they allow wholesale orders. How fun would it be to design your own line of scrapbook paper and have them available to the public?

Do you have it in you to become the next Amy Butler or Basic Grey? With all of these new opportunities online, it has become even easier to share your designs and creations with the world. If you decide to design your own fabric or paper, I hope you'll share what you made with us here in the comments. We'd love to see them!

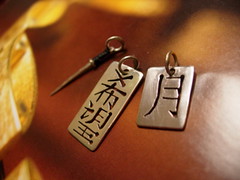
image courtesy of Christy Nelson via flickr

Saturday, August 1, 2009

Who Labels Someone An Artist And Their Works As Art?

Both artists and art dealers are considered to be art professionals both of which earn a living from forms of art. The artist is of course the one who is the creator of the art itself, whatever it may be and the art dealer is the person that the artist generally will turn to in order to be able to market and sell their art.

Artists come in various forms there is no restriction these days on what is considered art, whether you are looking at the normal types such as paintings, sculptures or clothing designers even for that matter. The art dealer often will be purchasing the art from the artists with the intention of on-selling them to collectors and the like. The art dealer therefore must also be knowledgeable in the market for the particular type of art and also in their location of artists with styles relevant to their client base.

Often the artists require the assistance of the dealers for the display and sale in galleries or studios for example although it is not entirely unusual for the artists to open their own galleries and studios doing the marketing for their material themselves. The transition from artist to art dealer therefore can be a fine line where as the transition from art dealer to artist is a much more difficult task.

Next to define is the difficult question of what is art anyway? If you took a group of individuals and ask them that specific question you will no doubt find you have a variety or responses. Your definition of art is therefore not necessarily my definition of art. Some people will see an art work and consider it to be not worthy of further attention whereas another individual may view the piece and consider it has amazing artistic values. From this also comes the phrase Outsider Art.

This basically broken down means art that is not within the norm of the majority population consideration of art. Many people who have had no specific training will create items of their own impression which may not fall into the standards currently on offer and can therefore obtain the label of outsider artists.

Some people consider that outsider art is created by artists who have received no formal training and therefore is perhaps not worthy. However you will find there are various forms of outsider art in open view to you on a daily basis. The way you're neighbor chooses to display their garden gnome collection may be considered a concept of outsider art. However that may be stretching the limits of outsider art just slightly.

The forms of outsider art can be considered in paintings not following normal processes but can also continue to a variety of different styles of art, often unheard of by normal collectors. Art forms such as tramp art or folk art. Generally, but not always, these creations of outsider art are 100% original in that the artist will then move on to create something of an entirely different theme or even material depending on what form of art it is in the first place.

Generally an artist of any form, the standard artist or the outsider artist, is defined by the style of art that they create. Whether this is in the form of writing, photography, sculpture or even music the choices are almost limitless. You can consider that the popularity of the art itself is due to the impression the art gives to the viewer in whatever form it is. If someone likes what the artist has created then their art is considered by others and not just a simple form of expression for the eyes of the artist only.

In my opinion art is in the eye of the viewer. There are many times I have seen where some item is noted as artistic and yet I can not see any feeling or visual beneficial effect from the piece itself does that mean I am able to decide that this is not art? Of course it can not, our grandparents considered everything we did as children to be art, even the often scary and misshapen clay works we did in our classrooms and they treasure these items for many years, is it art? To them it is. -Michiel Van Kets

Monday, July 27, 2009

For Little Ones

As a mom who does crafts, I do my fair share of making little hats and scarves for my toddler (not to mention a small pile of amigurumi). But yesterday I took that one step further and made REALLY little hats for my daughter's tiny beanies.
Step One: Let her pick the colors of yarn
(She originally wanted white, black and orange for the penguin. lol)
Picking Colors
Step Two: Make the hats! (Just crochet a few stitches in the round, only takes a few minutes!)
Make The Hat
Step Three: Make sure they fit!
See if it fits
Step Four: Make them pose for photos!

Pose!

Tuesday, July 21, 2009

Shop by Color!


Did you know you can now shop by color on Etsy? Well, you can. It's a fun little app they've created to give you yet another option for finding a special something at a new-to-you shop!

Drag your mouse over the grid and click on a color bubble. Etsy will search for items using those colors. Granted, not all items in that color are shown, but at least one, two or a dozen are available (it all depends on the sellers' descriptions).

I found this gorgeous print, after clicking on one of my favorite colors. How about this pretty illustration?

What's your favorite way to Shop Etsy?

Friday, July 17, 2009

Trying New Marketing Techniques

I have a very small budget for marketing my etsy store, so I spend time each week trying to find new and inexpensive ways to be seen by new people.

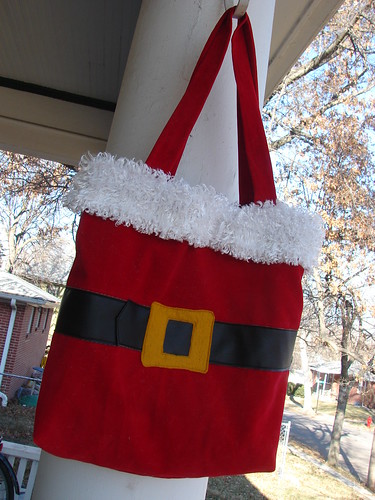
My latest project has been to enter a contest sponsored by Craft Magazine and The Crafty Chica to glitter and embellish a beach tote.  The contest runs until July 24th., so there is still time to enter.  See the info and official rules here and check out the Flickr pool to see the other entries.

I had a great time designing and embellishing my tote and I think that a few new people have now seen my work and there is always the possibility that I might win a prize :)chica bag collageThis has been a fun way to showcase the type of work I can do and to try something a little different.  My favorite part of this project are the stenciled stars on the lining (I have a mini tutorial for making freezer paper stencils here if you would like to give it a try).

I also have to share my favorite marketing tip of the week from Pam Hawk who tells us how to put our etsy shops in out pockets for about $11.00 here.

Please leave us a comment for your best inexpensive marketing idea, I’m always looking for new ideas!

Friday, July 10, 2009

Whew doggies!

Hey you! Yes you! We've up and got us a facebook fan page! Why don't you fan us? It's awfully hot here in Lincoln.

OH! And also new- follow us on twitter too! https://twitter.com/LNKHandmade

Wednesday, June 24, 2009

Announcement

Pillllz
For those interested- Lisa of LNKHandmade and formerly ChimeraCrochet has moved her etsy shop to http://oobbles.etsy.com and her blog to http://oobbles.com Stop by and tell her hello!

Higher

Friday, June 19, 2009

Display Ideas

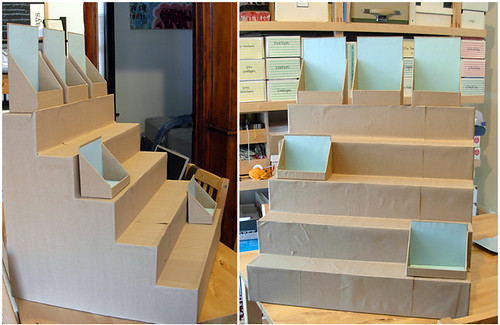
How awesome is this display?  If you want to see it all decked out and full of product, check out the post over at Indie Craft Shows. There are a lot of great display ideas. 

Maybe you'll see one or more of these at the Lincoln Handmade show in September?

Monday, June 15, 2009

Kanji Charms: Samuari Sword, Moon, and Hope

Here's a special order shipped to a wonderful customer in Great Brittan. Three very tiny delicate charms of sterling silver: Samuari Sword, Moon, and Hope in kanji. They are 1cm widest and 2 cm longest. The forged sword handle is wrapped in a very tiny black thread. The kanji charms are pierced and sawed.
This was my favorite image shot.

Saturday, June 13, 2009

Vote For Your Fave Hooker

Only a few more days left to vote in the Etsy Hookers challenge! http://etsyhookers.blogspot.com/ The theme this go round was "Take a walk on the wild side". Check them out!

Tuesday, June 9, 2009

Lincoln Handmade Team Prize Package

I made a video showcasing the Lincoln Handmade team's products and posted it at christynelson.net.  

I'm sure the craft challenge winner will be so excited to get all those great prizes! 

Friday, May 29, 2009

May Craft Challenge Sponsors

This month our team sponsored Christy's Craft Challenge and some of our members even participated! 


The voting ends today and then we'll send a prize bag o' Lincoln Handmade goodies to the winner!

Why not cast your vote

If you want to join in next month, you can sign up at the etsy shop

Monday, May 25, 2009

What to take, what to take . . .

I see so many forum threads where people ask the same question when they first decide to enter the “craft fair” ring, “What should I take?” Here’s the thing – you can take everything including the kitchen sink (thinking that you might actually need the kitchen sink), or you can mentally go through your set up and imagine what you would need for each step of the way.

In the end you will decide for yourself exactly what you need and believe me, you will refine your personal list every time you pack up your things and leave the show. But here goes.

Tent or canopy of some sort – the quick set up kind. I can’t emphasize enough how quickly you will recoup your investment here.

Tables to suit your needs. The fold up kind are great, relatively inexpensive and worth it. Be sure to take simple table covers. Uncovered tables look just awful without them and Bed Bath and Beyond has piles of them on sale always. Take your 20% Off coupon.

Any display pieces you need to make your work look well displayed, interesting, professional and/or cute, and that includes and signage for your work. Maybe you are having a sale on last year’s things – you’ll need a little sign. Print it on your computer and put it in a frame. For display ideas, search through Flickr’s craft show groups where you’ll find some incredibly creative ways to display your similar work.

Business name sign - if you have a business name, make a sign. One printed on your computer and in a frame will do nicely until you make bigger bucks and can invest in a big printed one. My advice is to be sure it looks tasteful, readable and professional if you want people to take your business seriously. If you are accepting credit cards (don’t get ahead of me here), print a sign with the cards listed that you accept. Cash only? Say so.

A little folding stool or an artist’s chair from Pier One or World Market. You’ll look professional and still have a little place to rest your tired feet.

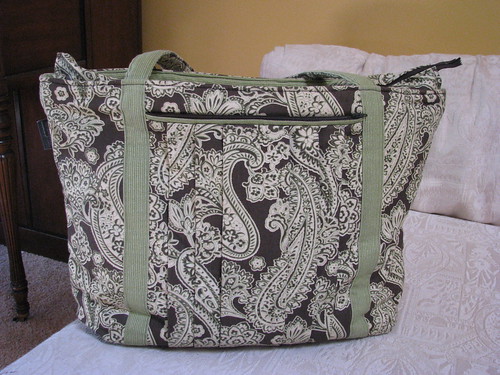
“Never Leave Home Without It Kit” - For my kit I use a canvas garden tote. They are inexpensive, big and roomy, come in a great array of colors, and are readily available at places like True Value Hardware and Home Depot. Garden centers get pretty pricey so I’d look at the hardware store first. This bag has pockets on the outside, pockets on the inside, huge sturdy handles and a big flat bottom. (No comment.). Here’s what I carry in mine and this stuff never leaves my tote so it’s always ready for the next event:

- My zippered bank bag with $100 in change
- A calculator set to the local tax rate
- A duplicate sheet sales order pad (the kind with built-in carbon paper)
- Two or three good pens
- A mini stapler and scotch tape
- Scissors
- A trash bag
- Tissue paper and bags
- Four short bungee cords (you’d be surprised how often these are handy)
- My KnuckleBuster and credit card slips (I use Propay)
- Diet Coke (I don’t leave home without it) and a snack or two
- A few tools for simple repairs – needle nose pliers, flat pliers, screwdriver
- Extra reading glasses
- Business cards
- Sales tax certificate
- Polishing cloths
- Mirrors if your product is worn

- Garden gloves so you don't wreck your hands as you carry your tent and tables

Last but not least – YOUR PRODUCT! This isn’t funny – I’ve actually left home and had to go back for it.

Ideally, as you think through the show from set up to an actual sale, there isn’t much else you need. You definitely want to appear as the professional you are so do not skimp on what you need to make your work look good! Again, as you get a show or two under your belt, you will see what other craftspeople use, some items you needed and didn’t have and what you can do without next time. It’s a refining process every time and making it simpler makes it more efficient for you and more fun in the long run.

Tuesday, May 19, 2009

Teacher Appreciation Gift Ideas

I wrote this article for Type-A-Mom a couple of weeks ago and thought I could share some of those ideas here at our Lincoln Handmade blog. 

Some schools have guidelines regarding gifts.  A good rule of thumb is to keep it under $20, useful, and heartfelt.  Here is a list of some of my craft friendly ideas.

1.  Gift Cards

I did an informal survey and this was definitely the preferred gift of all the teachers I spoke with.  Starbucks, Amazon, Barnes & Noble, Office Max, Applebees, and Michael's were all mentioned.  Because I can't give anything without a little crafting, there is a great tutorial for a gift card holder.  This makes it personal and allows for your child to write a little note to go along with the gift.

2. Lunch Sacks

There are so many great patterns out there for how to make reusable lunch sacks.  This pattern from Skip to My Lou is for an oilcloth lunch sack.  Why not pair that with a reusable sandwich bag.

3.  Lanyard

Do your teachers need to wear a name badge each day?  Why not spice up a lanyard for them?  Here is a pattern for a fabric lanyard. Think they might prefer something beaded?

4. Notebook Covers

This pattern (not free) is for those small 8" x 5" paper pads and includes a pocket for a pencil.  This is the kind of notebook I like to keep in my purse for random notes or lists.  This one uses scraps of scrapbook paper to cover a notebook.  It might even be fun to use class pictures to cover a notebook.

5.  Cookies or Other Treats

I hoard containers.  I can't help myself.  I know I'll find a good use for them someday. How about homemade cookies in a repurposed tin?

Do you have a go-to teacher gift?  Share them in the comments!

Sunday, May 17, 2009

easy handmade zipper bag gifts


When I first started sewing, I was a little intimidated by zippers. They aren't really that hard, though. The key, just like with all crafts, is practice.

I've created a super easy tutorial for making a zipper pouch with only four seams using a fabric placemat. These make great gifts by themselves or you can fill them with goodies. They're also nice for knitting and crochet projects because there are no raw edges to get into your yarn.

They don't take very long to make, so you'll be a zipper expert in hardly no time at all!

Friday, May 15, 2009

Tuesday, May 12, 2009

Woodworking As A Hobby

Merely because you love woodwork, it does not mean your workmanship is not a spare-time activity
A spare-time activity must be vested on. You would not have a difficult time doing so, as the affair is there in the first place. Hence, motivation and drive are apparently inherent as well.

Newcomers to woodworking often wonder what the necessary tools in starting up a workshop are. The solution varies from one woodworker to the next, because there's a tenacious list of required tools in the beginning. Plus, it depends upon the project.

For a good example, you travel to your nearest tool store to purchase a power tool. At present there's a diversity of manufacturers and naturally, prices differ as well. Like in any merchandise, the more expensive, and so the better the quality. Finer quality tools in woodwork have better design features and functions, in addition to a high tolerance in manufacturing, they in addition perform better.

Purchase the finest tool that you are able to afford. Start a budget on how much you're willing to spend on a specific tool. This is significant since you'll be using your tools on a frequent basis.

And if you're just starting out and you are able to only spend limited cash to establish your woodworking workshop, do not try for the absolute best then. You will be able to fall back on the ones that are relied on by most woodworkers that come in a reasonable price.

There are exclusions to the universal principle noted above. If woodworking is simply a spare-time activity you enjoy during the weekend, then you don't have to get the top-of-the-notch tools.

The key is acquiring a tool that's within your budget. But as often as possible, veer away from the cheapest tools and materials. They being cheap already tells something - these aren’t worth purchasing.

Here are the most common tools a woodworking newbie must have in his shop.

1. Electric Drill and Drill Bits - Electric drills are by far the first power tool purchased, they have so many uses besides drilling holes, there are attachments to turn them into paint mixers, sanders, screwdrivers, saws, grinders, lathes, the list goes on.

2. Electric Circular Saw - These can be very handy when cutting your wood pieces. No need to break the bank on this, however. Find one that’s easy for you to use and reliable.

3. Finishing Sander
These are used for sanding and finishing your projects. It can also be employed to smooth wood to clear out the edges.

4. Jig Saw - While not completely necessary, a good jig saw can help make your woodworking projects easier. They can add some eye-catching detail to a piece and make cutting wood easier as well.

5. Table Saw
Comparable to the drill, this is an additional tool that you must own and invest in. Though there are a few cheap table saws simply they're not as powerful as the high-ticket ones. They do not work equally well as you desire too. Acquire a table saw with a strong motor, one that's powerful enough that it can be used time and time again. If not, the blade will drag during the course of you ripping wood. It may even burn a few of your precious designs and no woodworker would desire that. Again there are loads of plans for jigs for this work horse.

6. Router - Routers have become one of the most used tools in a workshop, possibly even more popular than a table saw. A well equipped shop will have both a plunge base and a fixed base router; it is now possible to get a combination kit where one machine has both bases.

7. Compound Miter Saw
These are portable and used to cut miters, long wood stock and moldings. A great deal easier to handle than the table saw. You will be able to find plans on the internet for a neat table for this tool.

8. Drill Press
This tool is a workhorse in the shop it can be use for drilling holes, sanding with a sanding drum attachment.

9. Biscuit Joiner
Nifty tool for joining pieces of wood together. The tool cuts pocket-sized slots in every side of the join. The biscuit is inserted and glued in between, binding the parts altogether.

10. Basic Hand Tools
Claw hammers are the most common types of hammers used for woodworking and general repairs around the home.

Screwdrivers are needed for almost every woodworking project. Make sure you have various sizes of both Phillips head and flat head.

Wood chisels range in size from 1/4" to 2" wide in 1/8" graduations. They are available with wooden or plastic handles.

Tape measures come in a variety of widths and lengths. I would not recommend anything less than 3/4" wide for a tape over 6 feet long as they can not be extended out and remain rigid.
Clamps - Any project that is glued requires clamping to insure that the parts are bonded firmly in exactly the right position.

Finally, keep a wet / dry shop vacuum nearby so that you can quickly clean up wood shavings and dust. Keeping dust and wood particles to a minimum will reduce the risk of wood shop fires and help you breathe easier, too.

As a woodworking newcomer, you must have the best tools you are able to afford. However that also depends upon the projects that you plan on making. Prior to traveling to your closest home building provider to purchase your tools, think over what precisely you'll be constructing.
Check out http://www.woodworking.niche10.com for more info!

Saturday, May 2, 2009

Thursday, April 30, 2009

Getting Started In Scrapbooking

You have seen several of your friends' scrapbooks. You have also developed a growing interest to make one of your own. You finally decide to make some moves and go to the scrapbooking shop and grab some supplies. But once you enter the shop and see what is in store for you, you found yourself totally lost with hundreds of items to choose from. The same feeling of being lost also happens to other starters like you, believe it or not. Surely, you don't want to end up picking up some items you just thought you might need but you really do not. You want to have specific list of scrapbooking supplies you can use.

To help you out on this, here are some of the scrapbooking supplies must haves to start you with your scrapbook making:

Album - When selecting an album, consider the size and the theme you want to achieve. A definite size would help you plan the overall look of your scrapbook while the theme would help you choose the style of album you need. Try to find a large album if you want a good space for elaborate decoration; of course, this would depend on the theme you want to adopt. A small album is also okay if you prefer a manageable space. Sometimes, scrapbook enthusiasts have small and large ones but as a beginner, you may want to start on one size and improve from there.

Album refill - You may want to include album page refills the moment you buy your album. This is because album refills do not have standard sizes and you may not see refill that matches the size of your album in the future. Grab some packs so that you would not have to worry about finding one when you need them. Make sure also that when you buy an album, refills are available. Pick refills from the same album manufacturer you have bought.

Adhesive - There are several types of adhesive. There are also several brands of adhesives you can buy. Pick one or two that would match the exact need of your scrapbook. Glue Dots, Mod Podge, Triple Thick, EZ, 3D Dots, and Xyron are some of the brands you might want to pick.

A Pair of scissors - It is always advisable if you have a separate scissors for your scrapbook. This will let you keep it as sharp as possible. Your mom does not want you to use the kitchen scissors is another good reason why you should have your own pair of scissors exclusively for your scrapbook.

Papers - Different kinds of papers would let you have a beautiful scrapbook. But if you select one, make sure that the colors you pick match your chosen theme. You may want to go to scrapbooking shop and get different types of paper sold in sheets. This will give the pages of your scrapbook some variations.

Journal pens - If you buy journal pens, consider the permanent marking, fine tips, and acid-free ones. Acid-free pen is a must because it will keep the album clean and free from chemical reaction that would cause the pictures and the album to deteriorate.

Additional supplies:

Acrylic paint - For more vibrant look of the pages of your scrapbook, colored pens and papers may not be enough. You may want to add some acrylic paint on your shopping. You can buy them in batches or individually.

Rubber stamps - Rubber stamps could add more color and style to your scrapbook. Rubber stamps come on different shapes, sizes, and styles. Choose some that would enhance the look of your scrapbook.

Rub-Ons - To free yourself from cutting or writing texts on to your scrapbook, rub-ons are nice alternatives.

Die Cut Machine - To have a perfect cut every time you make some texts, purchase a die cut machine.

Scrapbooking kit - a clean and exclusive compartment of all your scrapbooking supplies is a must. Thus, you may want to have your own scrapbooking kit.

These are some of the things you could have as you start your own scrapbook. Make sure you have the primary things before buying other supplies that are more expensive.

Gook luck and happy scrapbooking!
Thanks Jon Simms!

Tuesday, April 28, 2009

Mother Mini

Hey... Don't forget Mother's Day is coming up!! I'm a mother and thought I'd post some etsy minis of the cool Mother's Day gift guides on there!


And don't forget to shop for mom (or yourself!) tomorrow at Artitudes!

Sunday, April 26, 2009

Buy Handmade and?

Of course, as crafters, many of us strive to buy handmade whenever possible. (If we don't make it ourselves, of course!) But what about buying local? If you have something handmade you want to purchase, do you go out of your way to source a local artisan to produce it? Here are two examples of Lincoln Handmade buying local and being greatly rewarded by using our local talent!
First up is this awesome laptop bag made by pursesbyashley, a wonderful bag creator and fabric artist!
laptopbag

Next up is this beautiful toddler dress and knit shrug fashioned by the talented Crafterella:
Elsa in dress
She did such a fantastic job and it was great to be able to work with someone in person as opposed to having to do it all on the internet.

What have you bought handmade and local? Tell us about it below!

Tuesday, April 21, 2009

Craft Night with the Lincoln Handmade Team

IMG_1918

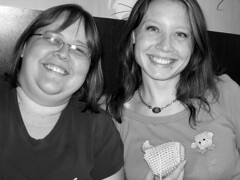
We had an excellent time last night at craft night.  There were seven of us in attendance and we ate and crafted the night away.

IMG_1919

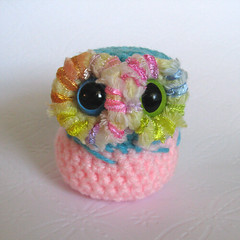
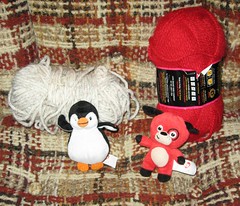
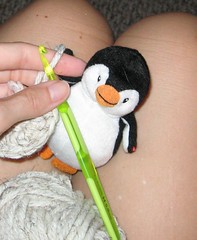
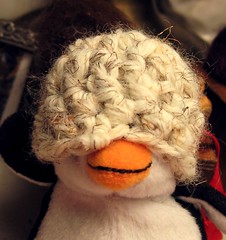
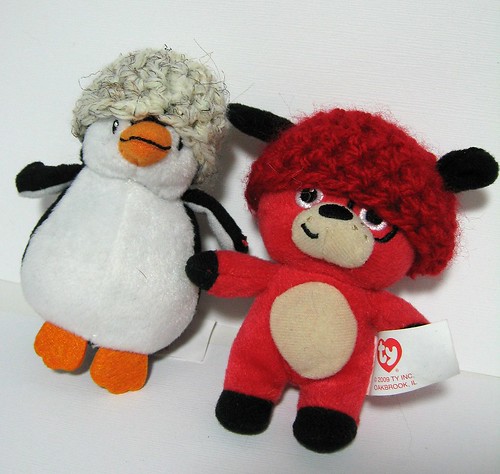
Korinne and Deb are shown here.  Korinne made some monster truffles that were pretty much amazing and here she is working on her uber popular instant cemeteries.  Deb worked on making silhouettes of her cute family. 


IMG_1922

Lisa spent most of the night with the Big Kick and paper punches.  She had a really great idea of running through some old book pages and CD liner notes to make them into flowers and other shapes.  Here she is crocheting after she got kicked off the machine. 

I'm not pictured but I spent most of the evening chatting away and eating. 

IMG_1921

Here we have Stacy, Kelly, and Ashley.  This was Stacy's first time at one of our meetings and we tried not to scare her off.  Please come back!  Kelly is a veteran.  She used the big kick to cut out some fabric.  In this picture, it is Ashley's turn at the Big Kick.  I have a feeling we're going to see flowers and scallops on a lot of lnkhandmade team items in the future!

At the end of the night, 18 boxes of fabric were delivered to my house!  We had a great time going through it and picking out things to take home.  I still have some left (let's face it, A LOT) so if you're in the neighborhood and would like some fabric, let me know! 

Friday, April 17, 2009

Spring is in the Air

It is really starting to feel like spring and that means it’s time to open up the windows to freshen up the house and do a little cleaning.

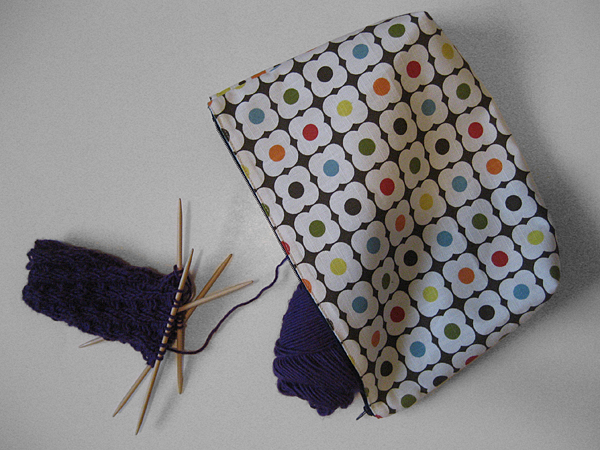
I knit and crochet to relax and all the knitting needles, crochet hooks, and other notions plus a mountain of yarn can really pile up. I knew there was a problem when I lost one of my knitting needles in the couch and while I was retrieving it I also found 2 crochet hooks, a tapestry needle and a stitch counter.

knitting bucket organizer

My solution was to create the ultimate knitting and crochet organizer that was also portable. Knitting needles and crochet hooks are stored on the outside, leaving room on the inside for yarn caddies, patterns, books, WIPs, and other notions. There are also pockets around the interior to help keep smaller items from getting lost.

I recycled and old sheet for this organizer, but there are so many different fabric options the design possibilities are endless. If you would like to make your own bucket organizer the pattern is available for free here.

yarn caddyMy bucket also holds two yarn caddies made from 2 liter bottles to keep dirt and cat hair off of my yarn. They’re easy to make, just remove the bottom of a 2 liter bottle, I used an exacto knife and then re-cut it with scissors to smooth the edge. Punch a hole about every inch around the bottom of the bottle leaving about 1/2” between the hole and the cut edge using a standard hole punch. I then crocheted into each hole three times, I just used the crochet hook that was recommended for my yarn (any scrap yarn you have will work). I single crocheted in the round until it measured about 4”. To finish it off I single crocheted one, chained one and skipped a stitch and repeated that all the way around. Then I just crochet a chain and laced it through the holes. (Excuse my pattern writing, the original tutorial is unavailable and I am not a pattern writer!) I love these things and they are so easy to make.

Now that your knitting and crochet supplies are organized it’s time to clean the rest of the house or do what I did, start a new knitting project!

Thursday, April 9, 2009

A change in plans . . .


What started with BIG plans to build a studio in our detached garage with an absolutely gorgeous BIG view morphed into a compact little studio space in our house. Not exactly what I had planned but I’m coming around to realize that I needed to severely pare down my equipment and supplies and work more efficiently. Who needs all that space anyhow? I mean it.

I really thought we’d finish off a 12x18 space in our detached garage and shop where I would have all of my metalworking equipment (not to mention a great view). We moved into our home in the Fall and I had no intention of working on jewelry or even needing a studio until then. Right. The phone starts ringing. Local galleries are selling my work better than before (go figure - yay) and I need to continue refilling the cases with my simple jewelry. {sigh} I surrender.

My DH Ed suggests that I take space in our basement where our workout area will be, consolidate my equipment and set up a studio inside. I have to admit, it’s gonna be warmer. He starts carving out a place for me to work. I’m a stubborn girl and not all that happy about changing plans you understand, but I start to come around and see that this is actually going to work!

We hang pegboard on the walls of my little 6x12 area (one third the original planned size) and it’s wonderful I find, to be able to see my wire and stock immediately. No digging through boxes to find that 21 gauge wire and bezel wire and stones and stock. I have outlets every 2 feet – OMG – no more extension cords. We’ll be hanging bi-fold doors so that the area looks like a huge walk-in closet and can be closed off when I’m not using it, thus hiding the bench mess. And someday when I’m too old and decrepit to pound metal any longer, this can become a big old walk-in closet with great lighting.

My bench is one that Ed built out of 1” square tubing with a thick particleboard top. He built me a matching soldering table with a steel top, both with shelves underneath to store plastic storage boxes, oxyacetylene tanks with miscellaneous supplies. I love it.

I get a kick out of posting pics of my ‘bench mess’ and I’m really proud that I’ve managed to carve out a bit of workspace from such a reduced original plan. Smaller is better and from an efficiency standpoint, this could not be better for me.

Saturday, April 4, 2009

Having Fun!


LNKHandmade Four
Originally uploaded by Chimera Creation
Our Lincoln Handmade team meetings are SO much fun. Here is a photo of Christy and I, where I am comparing our chick sizes. She has a much bigger chick than me, but that's okay!